This page contains information about the basic actions that almost every user encounters when working with a virtual server
Each virtual server has a control panel, through which the client is available to use the basic management tools of the virtual server: stop, start, restart, reinstall and virtual monitor (VNC). Below is a step-by-step example of navigating to the panel.
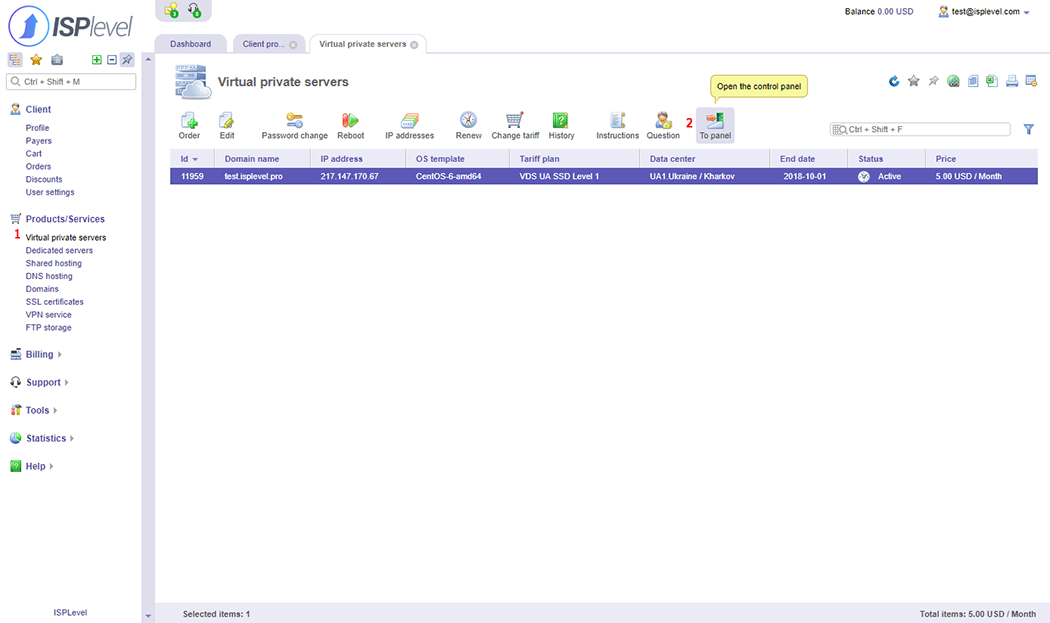
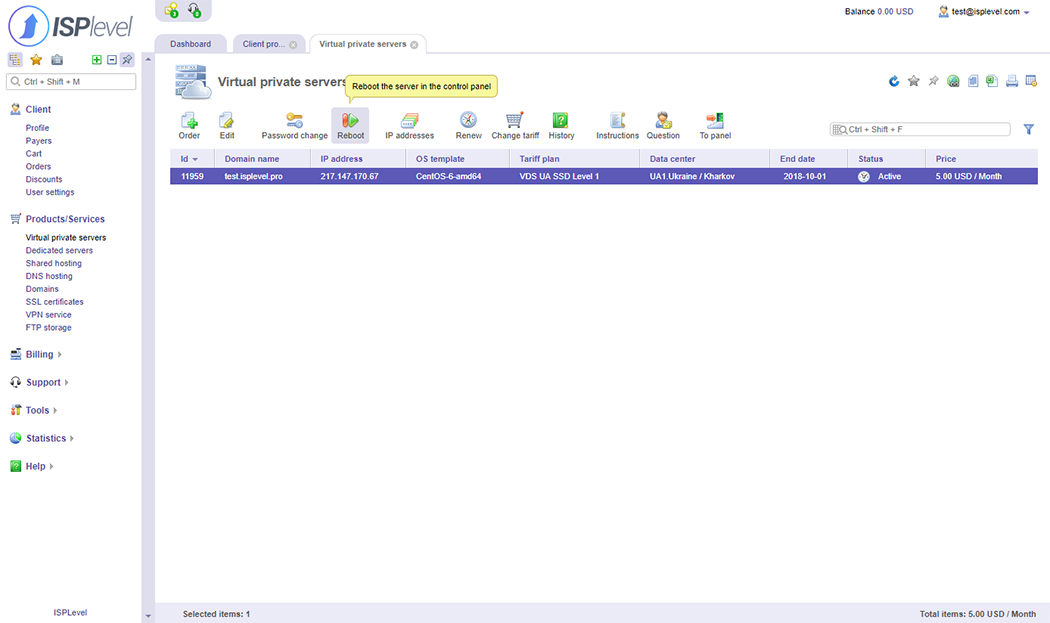
Using the personal billing cabinet, go to the Virtual private servers section and from there to the control panel by clicking on the server you need before.
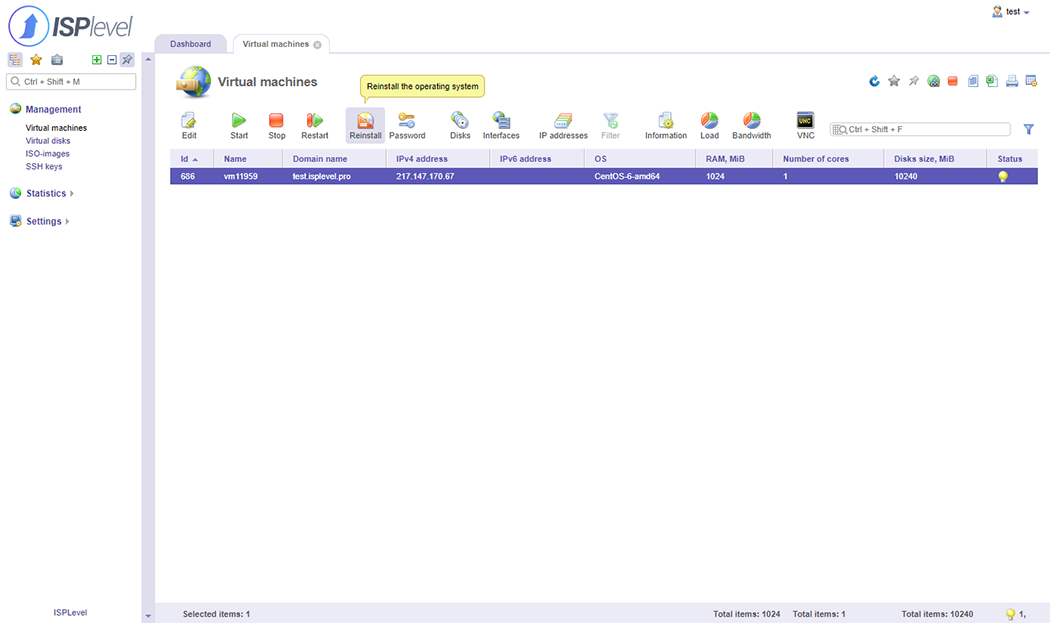
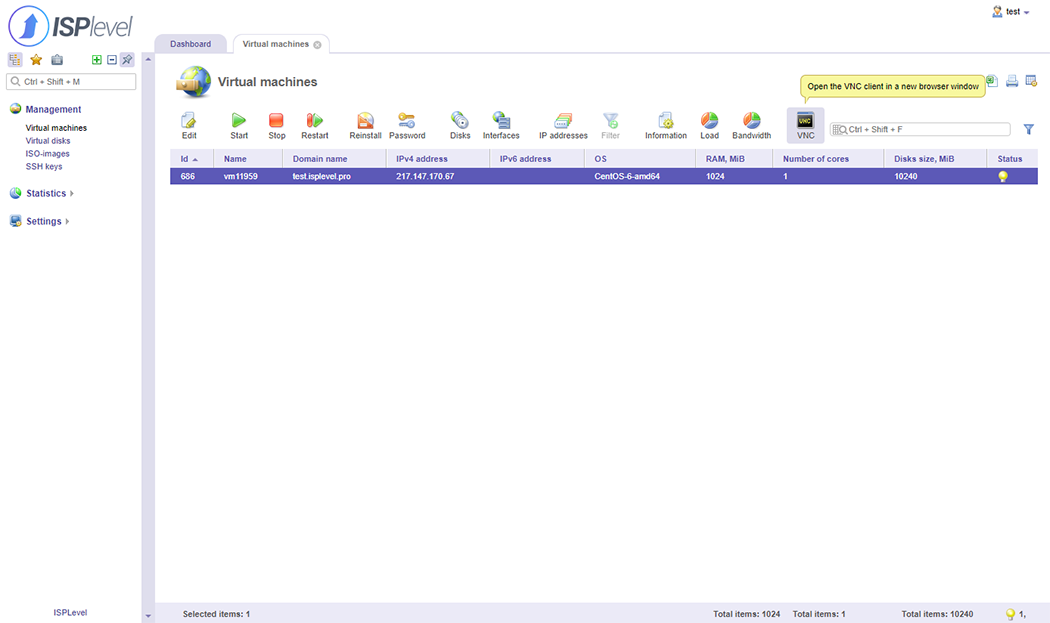
After the transition, a new portal tab will be opened, from which we go to the section Management - Virtual machines
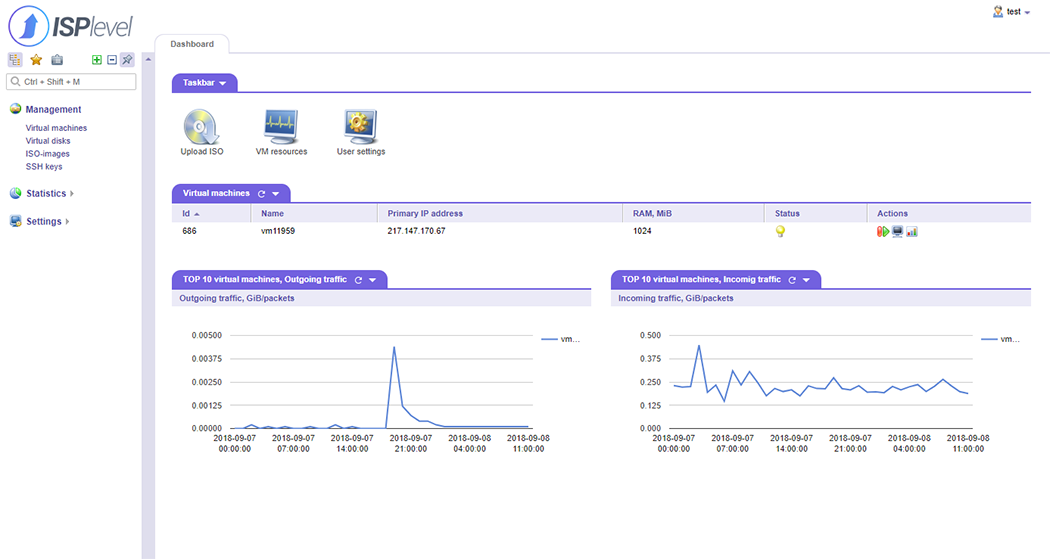
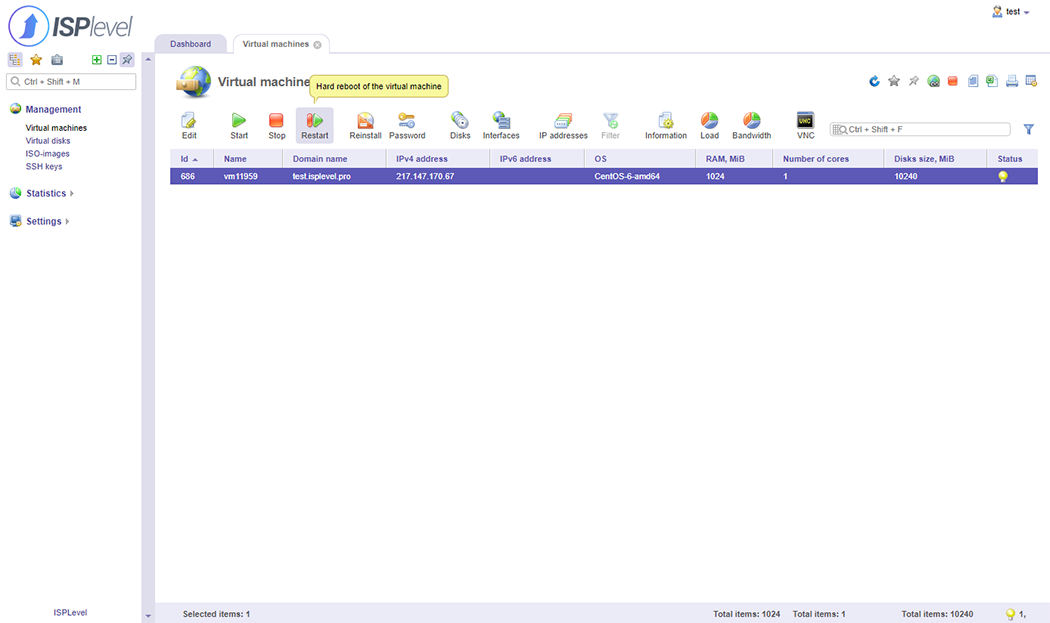
So we got to the main page of VDS server management. Using the menu displayed on the toolbar, we can perform the operations of turning on, stopping, restarting, reinstalling, changing the password (only for Linux\Unix systems) and (VNC)
After ordering and installing a virtual server, each user is provided with authorization data to the server. The information for the connection is sent to the contact e-mail address, which is attached to the user, and is additionally duplicated in the instruction, which can be found in the personal account of the billing panel in the section 'Virtual private servers'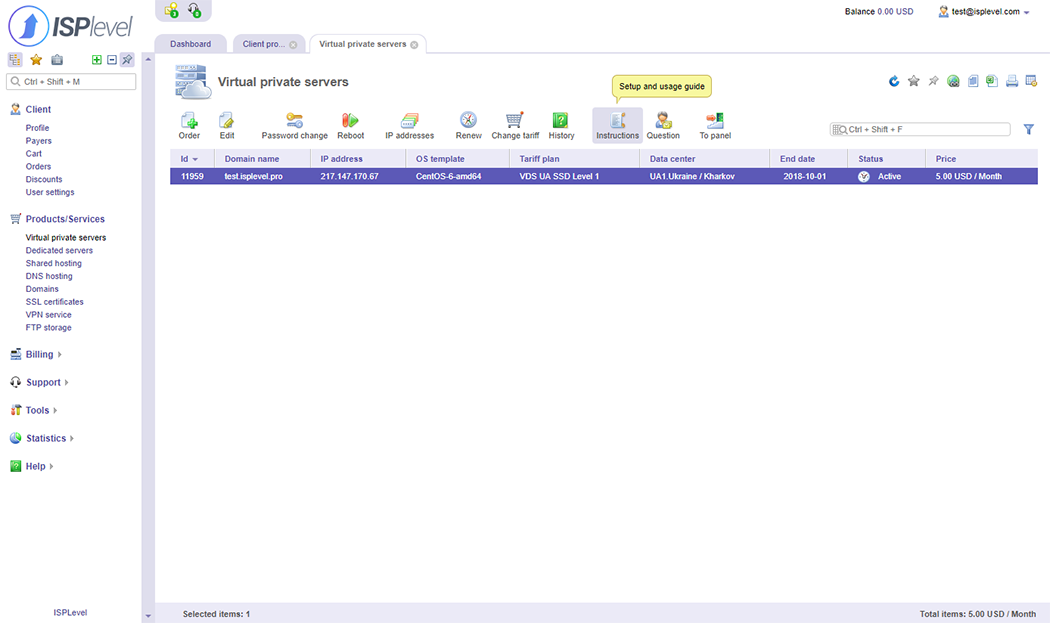 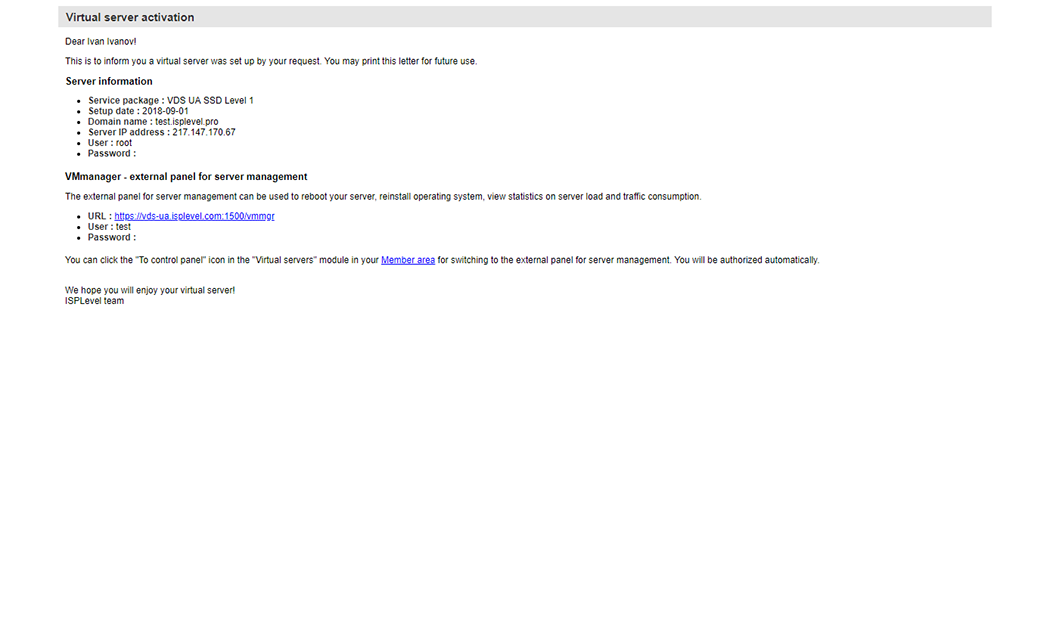
The virtual server can be restarted in two ways, which we presented below To reboot the server on the left side of the billing panel screen in the 'Products/Services' category, click the menu item 'Virtual private servers', then select the required server from the list of your servers and click 'Reboot'.
You can also reboot the virtual server from the control panel of the server.
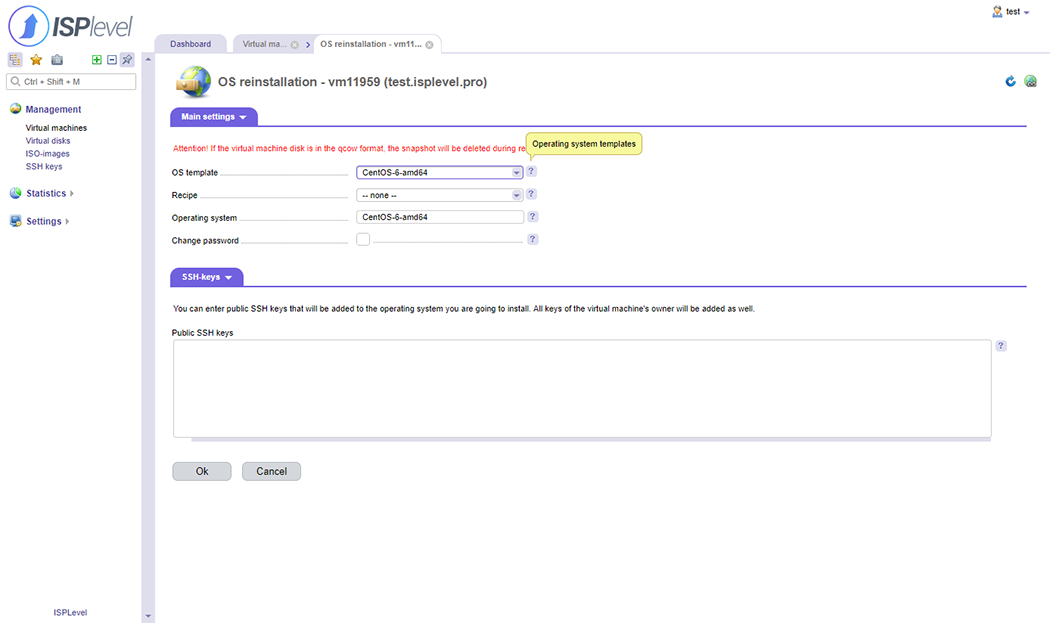
In the server management panel, go to the virtual servers section, select the required server and click on the button 'Reinstall' button. In the dialog box, select 'OS Template' and click OK.
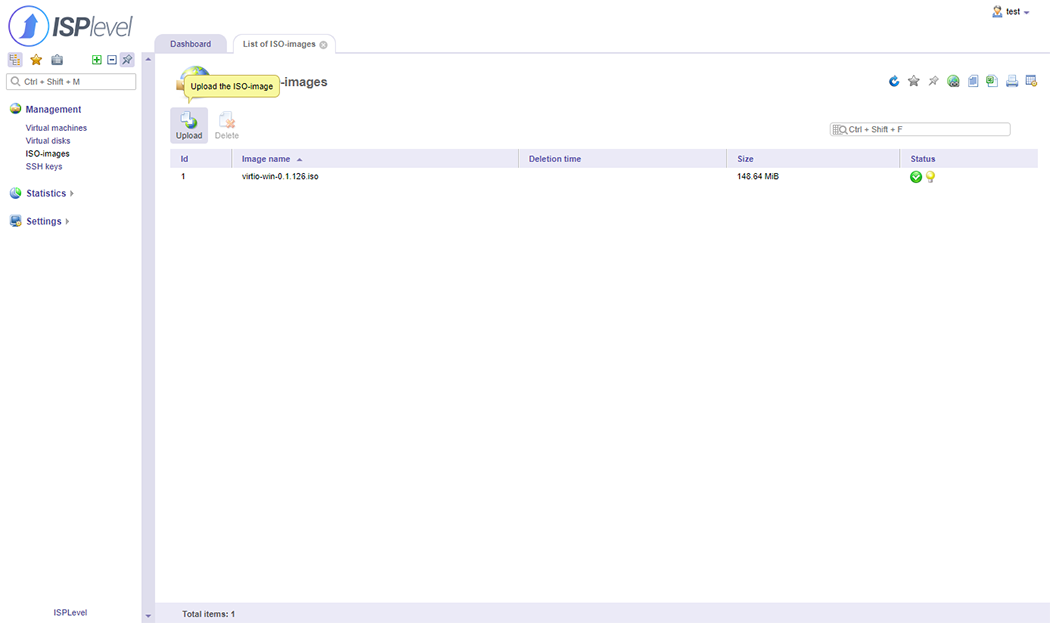
In the server management panel, go to the virtual servers section, select the required server and click on the button 'ISO Images' in the 'Control ' category on the left and click on the 'Upload' button.
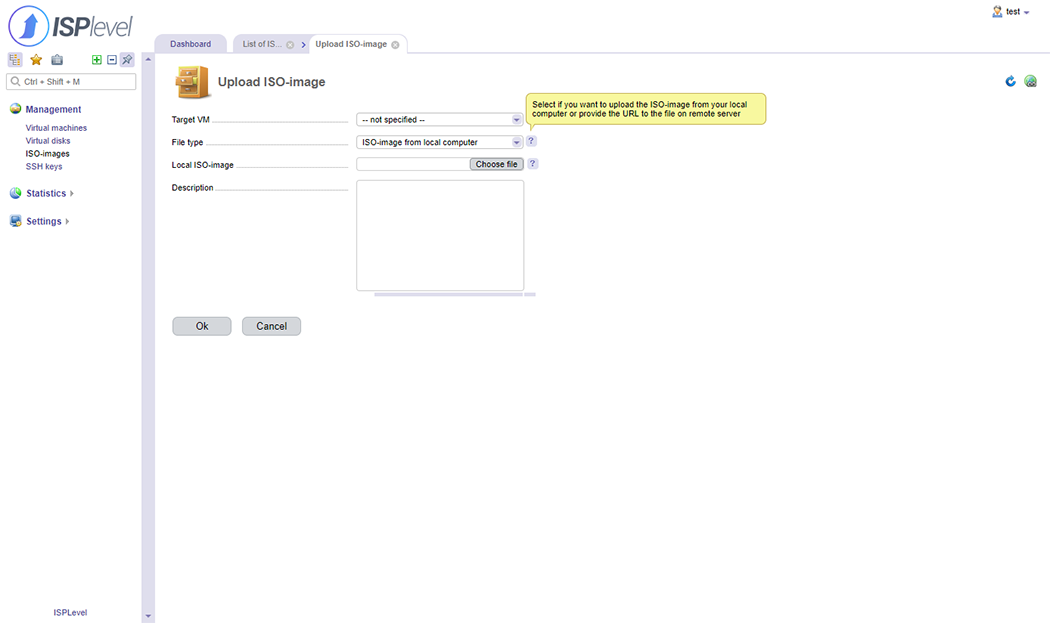
In the open tab you can specify where to download the ISO Image and confirm the download.
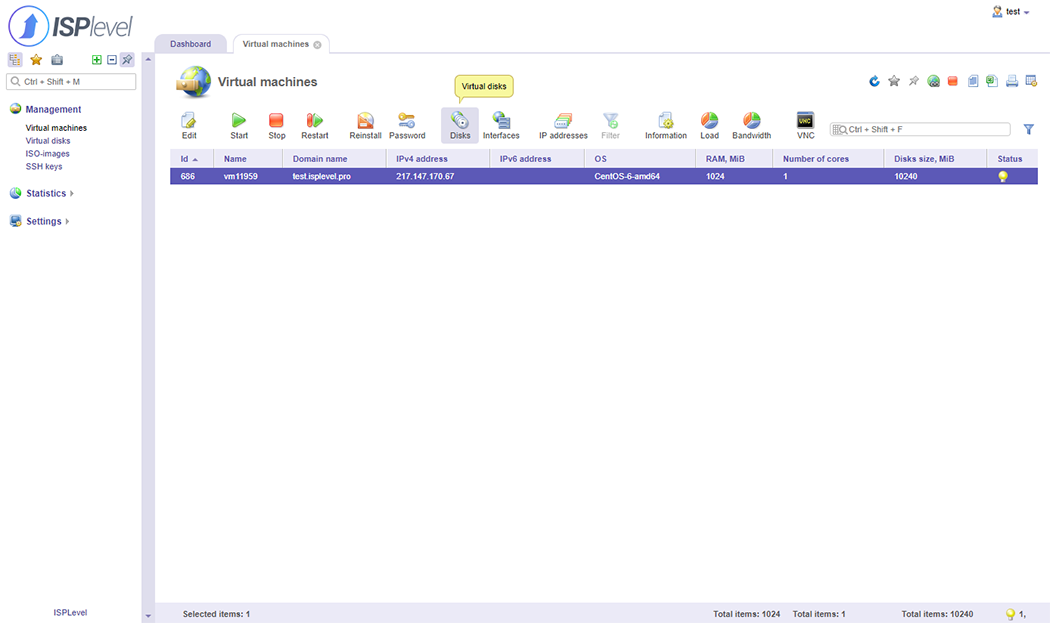
After downloading the image to the server, you must necessarily stop the virtual server to connect the downloaded image.
To connect the disk to a stopped server, in the main window of the server control panel, select the server and click 'Disks' and in the new window click 'ISO' where we can already select the downloaded form.
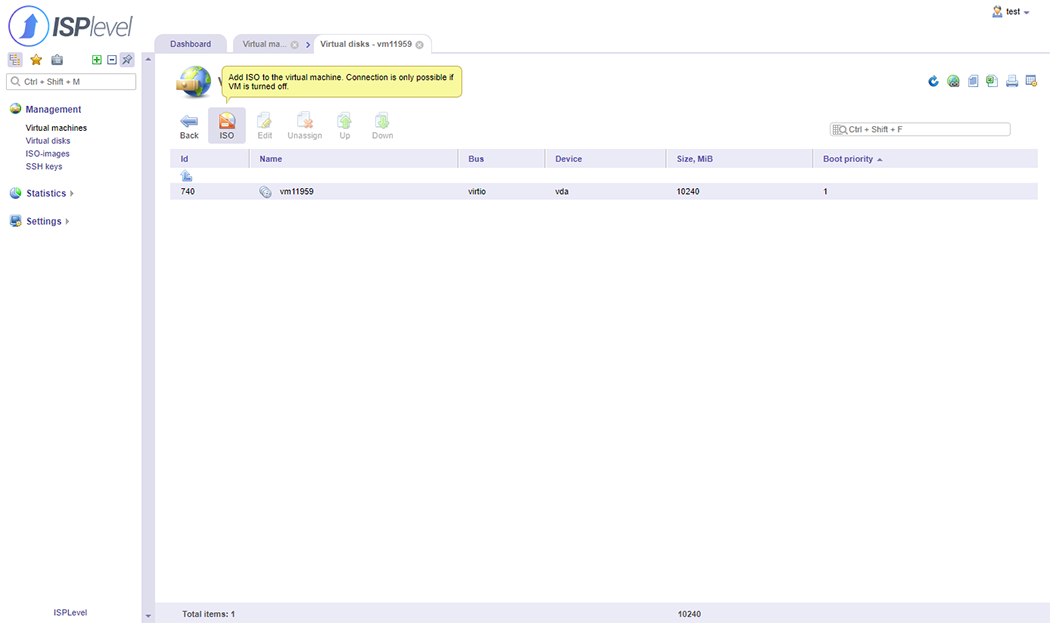
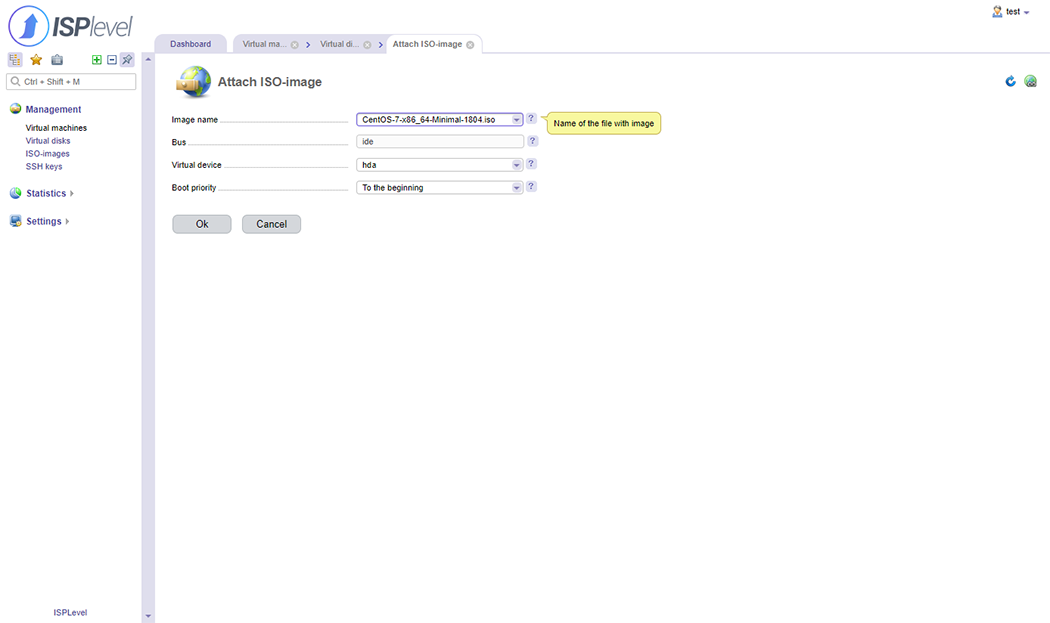
After connect our image, we return to the control page, start our virtual server and open VNC.
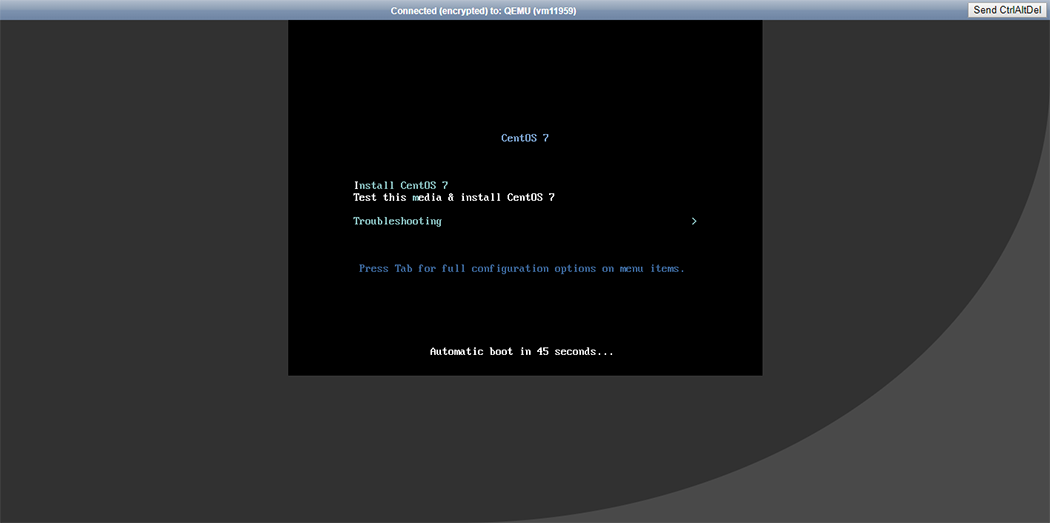
We see that our image has already successfully uploaded and is ready for work!
Sometimes there are situations that you need to connect to the virtual server through the console without the network. For such cases, we have a remote access service to the server (VNC). In the server management panel, go to the virtual servers section, select the required server and click on the button VNC

No we do not allow to use VDS for VPN\Proxy and tunnel servers.
|